[ad_1]

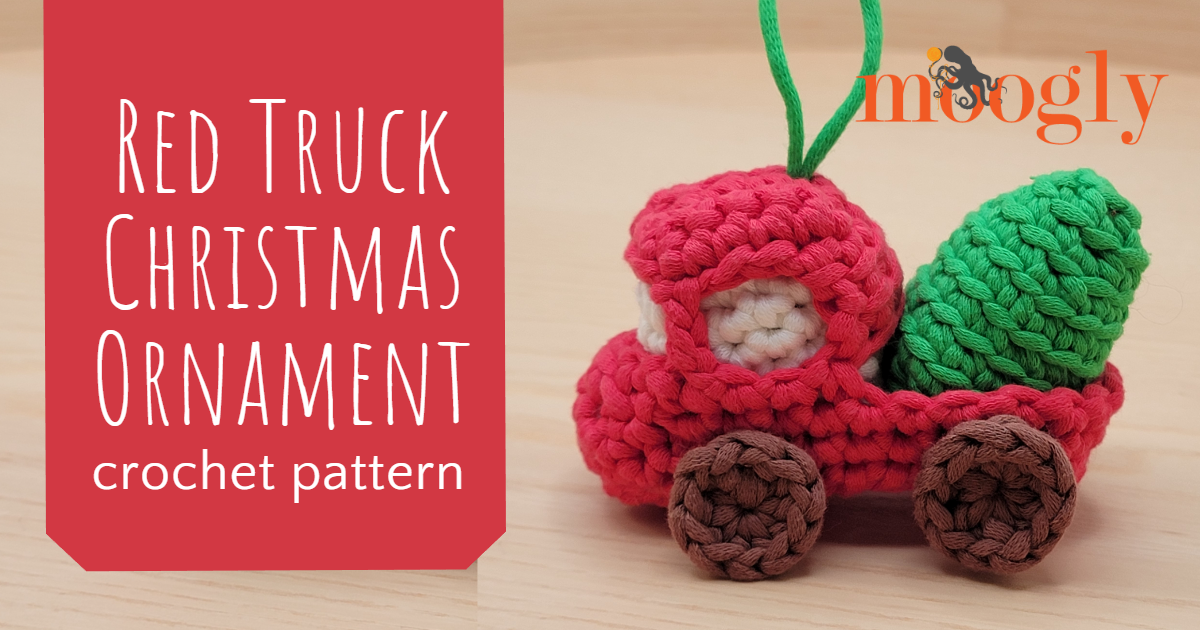
If you love holiday crochet that is cute, quick, and giftable, the Red Truck Christmas Ornament Crochet Pattern checks every box. Designed to be small enough for any tree but detailed enough to stand out, this small ornament is made with Bernat Maker Minis and works up fast. It uses only a few yards of yarn, making it an excellent way to use up leftovers and turn them into something special. This red pickup truck with its festive tree adds the perfect touch of handmade nostalgia, and is a free crochet pattern on Moogly!
Disclaimer: This post includes affiliate links; materials provided by Yarnspirations.
Prefer an ad-free PDF?

Prefer the free blog version? Keep scrolling!
Part of the 2025 Holiday Stashdown Crochet Along
This is the 11th annual Holiday Stashdown, hosted on CAL the Central Facebook and Ravelry groups, and organized by Underground Crafter! Each of the patterns in this crochet along are made with 100 yards of yarn or less of each color used, and meant to work up quickly.
How To Join the 2025 Holiday Stashdown CAL

And I’m honored to have taken the second to last spot for the year! Be sure to head to Underground Crafter for links to all of the amazing projects – and the past year’s patterns as well!

Whether you hang it on your tree, add it to a garland, or use it as a gift topper, it adds a warm and wonderfully nostalgic touch. The bright red truck and little green tree bring instant holiday charm wherever you place it, making it a fun accent for wreaths, mantels, and special gifts. It is the kind of small, heartfelt detail that helps your seasonal decor feel personal, cozy, and full of cheer!

Red Truck Christmas Ornament
Add this pattern to your Ravelry Queue and Favorites
US – G, 4.0 mm crochet hook – Susan Bates
40 yards Bernat Maker Minis (#5 Bulky; 75% Cotton 25% Nylon; 500g/17.65 oz, 560 m/612 yds)
Colors Used: Red, White, Green, Brown (10 yds or less of each used)
Fiberfill (very small amount, can use scrap yarn instead)
Gauge: 4 sc = 1″
Finished Size: approx 4″ long x 2.5″ tall excluding hanging loop

HELPFUL LINKS AND TUTORIALS
Red Truck Christmas Ornament Tutorial – COMING SOON
NOTE
As you assemble this piece, most of the ends will end up inside the ornament. After securing these ends, do not trim them off – stuff them into the ornament to save on stuffing!
SPECIAL STITCH
CSTR – Chainless Starting Treble Crochet: Pull up the loop on the hook to the height of a tr st. Secure the top of the loop with your finger on the hook, and yo with the loop itself twice. Insert the hook in the indicated st, yo and pull up a loop, [yo and pull through two loops] 3 times to finish the st. See a video tutorial for this stitch worked as a double crochet here.
Red Truck Christmas Ornament Instructions
Make the BODY of the truck with Red yarn
Row 1: Ch 5, skip the ch closest to the hook, sc in each rem ch across; turn. (4 sc)
Rows 2 – 4: Ch 1, sc in each st across; turn.
Rnd 5: Ch 1, sc in each st across, sc 4 along the sides of previous 4 rows, sc in each foundation chain, sc 4 along other side of previous 4 rows; join. (16 sc)
Rnd 6: CSTR in the first st, ch 2, skip 2 sts, tr in next st, LTR in next 5 sts, ch 2, skip 2 sts, tr in next st, ch 4, skip 4 sts; join. (8 total tr and ltr)
Rnd 7: Ch 1, sc in first tr st, sc in each of next 2 chs, sc in next tr, ch 14, skip 4 sts, sc in last ltr, sc in each of next 2 chs, sc in next tr, (sl st, CSDC) in next ch, dc in each of next 3 chs, work 2 sl st in post of last dc made; join to first sc of rnd. (8 sc, 4dc)
Rnd 8: Ch 1, sc in 4 sc, sc in each ch, sc in next 4 sc, 2 sc in side of CSDC, sc in next 4 sts, sc in each sl st; join. (30 sc)
Rnd 9: Ch 1, sc in each st around; join and finish off, set piece aside.

Make the BOTTOM of the truck with Red yarn
Row 1: Ch 12, skip the ch closest to the hook, sc in each rem ch across; turn. (11 sc)
Rows 2 – 4: Ch 1, sc in each st across; turn. After Row 4, finish off and set piece aside.
Make the CAB insert with White yarn
Rnd 1: Make a magic circle, working into the ring, ch 1, [sc 3, ch 2] 4 times; join. (12 sc)
Rnd 2: Ch 1, [sc in next 3 sts, sc in ch-2 sp] 4 times; join. (16 sc)
Rnds 3 – 7: Ch 1, sc in each st around; join. After Rnd 7, finish off and set piece aside.
Make the TREE with Green yarn
Rnd 1: Make a magic circle, ch 1, work 6 sc into the ring; join. (6 sts)
Rnd 2: Working in the BLO, ch 1, [sc in the next st, 2 sc in the next st] 3 times; join. (9 sts)
Rnd 3: Working in the BLO, ch 1, [2 sc in the next st, sc in the next 2 sts] 3 times; join. (12 sts)
Rnd 4: Working in the BLO, ch 1, [sc in the next 3 sts, 2 sc in the next st] 3 times; join. (15 sts)
Rnds 5 – 7: Working in the BLO, ch 1, sc in each st around; join.
Rnd 8: Skip the first st, sl st in the next 3 sts, BLO sc in the next 2 sts, BLO hdc in the next 3 sts, BLO sc in the next 2 sts, sl st in the rem 4 sts; join and finish off leaving a long tail for sewing, set piece aside.

Make the TIRES with Brown yarn – Make 4
1 Rnd: Make a magic circle, work 10 hdc into the ring; join and finish off leaving a long tail for sewing, set aside.
Assembling the Ornament:
Step 1: Sew the hdc sts in the last rnd of the TREE to the second row of one flat side of the CAB.

Step 2: Insert CAB and TREE into BODY as shown below. Line up the CAB and the back of the TREE with the bottom of the BODY.

Step 3: Sew on the TIRES, going through both layers to secure the CAB and TREE in place.

Step 4 – Make Hanging Loop (optional): Cut a short length of green yarn, and fold in half. Tie a knot at the ends, and use a yarn needle to thread the loop through the top of the CAB and BODY above it.
Step 5: Add a small amount of stuffing or scrap yarn to the inside of TREE, CAB, and between the CAB and the front hood of the BODY.

Step 6: Sew the BOTTOM to the BODY using the whip stitch. Weave in ends.

Need to Keep Your Fingers Moving?
All done with the Shell Stitch Crochet Duster and looking for your next project? Check out the Moogly Free Patterns Page or Ravelry!

If any Moogly pattern inspires you to make your own project, be sure to tag me @mooglyblog or #mooglyblog so I can check it out too!
The Fine Print
Follow Moogly on Facebook, Pinterest, TikTok, Bluesky, YouTube, and Instagram! Thank you to Yarnspirations for providing the materials shown in this post. Please do not reprint or repost this pattern. Please do link to this page to share this pattern with others. If you wish to make items for sale from this pattern or translate it to another language, please visit the About page for details.


[ad_2]
Source link